A strong WordPress SEO strategy is the key to gaining website traffic, boosting leads, and generating sales. However, it’s also a complex, multi-faceted process.
With so many best practices associated with creating an SEO-friendly WordPress website, it can be difficult to keep up.
We don’t claim to hold all the secrets to WordPress SEO success. However, we can provide an actionable, step-by-step guide that’s guaranteed to have a positive impact on your search engine rankings.
By following these techniques, you can create pages, posts, and landing pages that search engines will love.
In this article, we’ll share 13 WordPress SEO strategies that can put you light years ahead of the competition, and earn you that coveted spot on Google’s number-one pages.
So, Let’s get started!
1. Install a Dedicated WordPress SEO Plugin
WordPress is well known for being search engine-friendly out of the box. However, you can still benefit from installing a dedicated WordPress SEO plugin.
Yoast SEO and All In One SEO (AIOSEO) are two of the most popular WordPress SEO plugins. Both of these tools have the features you need to optimize your WordPress website for search engines.
The major difference is that AIOSEO doesn’t provide content analysis or SEO scoring, whereas those features are included in Yoast SEO.
In order to make the solution user-friendly, some of the more advanced functionality is hidden in Yoast but is enabled by default in AIOSEO.
Regardless of whether you opt for Yoast SEO or AIOSEO, you’ll be able to leverage snippet optimization tools for your WordPress website.
Below is an example of the text that represents each web page in the SERPs:
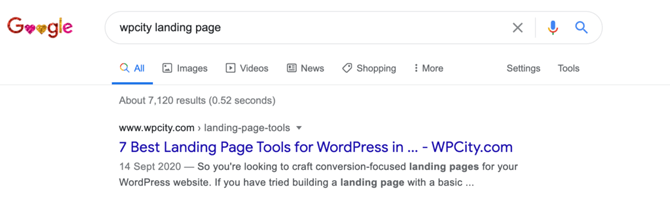
Snippets don’t directly impact your rankings. However, a well-written snippet can affect your Click-Through Rates (CTRs) by helping your content stand out from the competing search results.
There’s evidence to suggest that an engaging snippet can increase your CTRs by 5.8 percent.
Search engines use CTRs to determine how relevant your content is for a specific keyword. If your eye-catching snippet manages to secure high CTRs, your rankings should improve.
For best results, we recommend communicating the page’s main takeaway and including a clear Call To Action (CTA).
You can also use WordPress SEO plugins to edit your SEO title. This is the heading that appears on the SERPs:
A page’s SEO title should clearly communicate the article’s contents to both search engines and visitors. However, this can be a tricky balancing act.
We recommend creating a title that grabs users’ attention and then looking for opportunities to insert relevant target keywords within the title.
Wherever possible, aim to place keywords at the beginning of the title, as this often delivers the greatest SEO boost.
2. Use a Focus Keyword for Your WordPress Pages and Posts
A focus keyword is a word or phrase that you want your content to rank for. For example, if you want a page to rank for the term “best food processor”, you’ll need to optimize your content for those specific words.
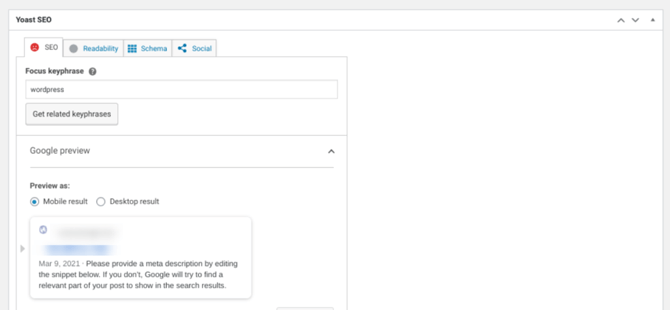
You can enter your focus keyword or phrase into a WordPress SEO plugin, such as Yoast SEO. This plugin will then analyze your key phrase.
For instance, Yoast checks the length of your focus key phrase, and whether it contains any ‘function words’.
Function keywords carry little meaning, and don’t help search engines understand your content. Some examples of common function words include “and”, “the”, “a”, and “have”.
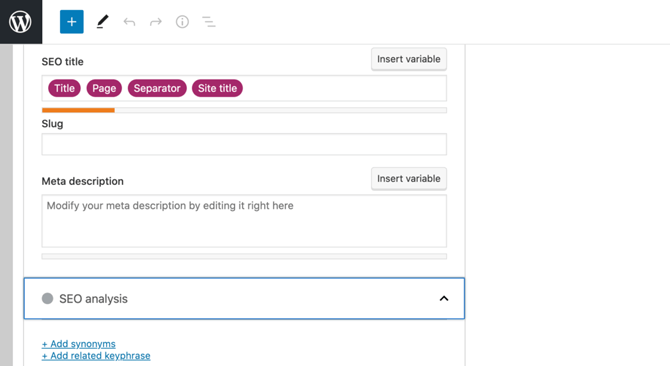
Yoast will also score your WordPress site’s content based on the presence of that focus key phrase. This plugin checks not only your body text, but also the content title, SEO title, and meta description elements:
You can also view suggestions on how to increase the chances of ranking higher for your focus key phrase.
For example, the plugin may recommend using your keyword more frequently throughout your body text or moving the key phrase to the start of your SEO title.
By following these suggestions, you can help search engines understand your content and improve your WordPress SEO.
However, it’s worth noting that these are merely recommendations, and it’s important to balance Yoast’s suggestions against providing a strong User Experience (UX).
For example, including your entire focus key phrase in every subheading may boost your SEO, but it can also result in awkward, unhelpful headlines.
By balancing your SEO plugin’s recommendations with UX requirements, you can improve your search engine rankings while continuing to provide high-quality, engaging content.
3. Scan Your WordPress Website for Broken Links That Harm SEO
Broken links happen for many reasons. You might delete a post or move it to a new location. You may also encounter broken URLs after migrating your WordPress site to a new domain. Even a simple typo can result in a broken link.
When search engine bots encounter a broken link, they’ll crawl the URL to confirm that it’s broken. This wastes crawl budget that could be spent indexing the rest of your WordPress website.
Broken links are also disastrous for the User Experience (UX). If a visitor cannot access the content they want, they may navigate away from your site, affecting key metrics such as average session duration.
If user behavior suggests that your site isn’t providing a positive UX, it will be reflected in your search engine rankings.
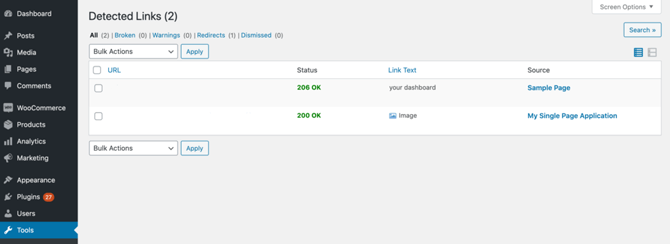
Since broken URLs are bad news for WordPress SEO and UX, it’s a smart idea to regularly scan your site for broken links. You can perform this kind of content audit using a plugin such as Broken Link Checker:

Once activated, this plugin will automatically scan your site. You can check to see whether the plugin has identified any broken links by navigating to Tools > Broken Links:
The easiest way to fix a broken link is to implement a 301 redirect using a WordPress plugin such as Redirection.
After activating the plugin and completing the setup process that it automatically prompts you with, you can go ahead and navigate to Tools > Redirection > Add New.
In the Source URL field, type in the broken link. Then you can specify a new destination for it in the Target URL field:
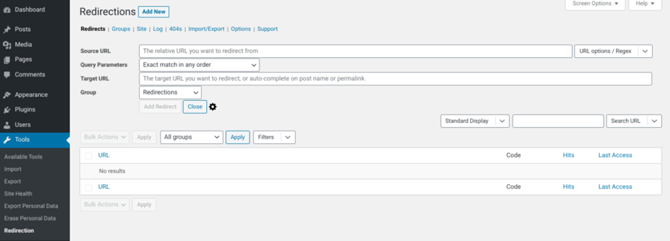
Finally, you can click on the Add Redirection button to save your changes. Rinse and repeat for all the links that Broken Link Checker has identified.
4. Optimize Your WordPress Permalinks for SEO
When determining a web page’s ranking, search engines consider many factors, including the page’s URL.
By optimizing your WordPress URLs, you can help search engines understand each page’s content. This increases your chances of appearing in relevant SERPs.
To get started, it’s important to make sure that you’re using a clean and clear permalink structure, because this helps search engines understand how your site is organized.
If there’s a disconnect between your permalink and your site’s structure, the bots may struggle to navigate your WordPress website and index its content.
You can examine and edit your site’s permalink structure by navigating to Settings > Permalinks:
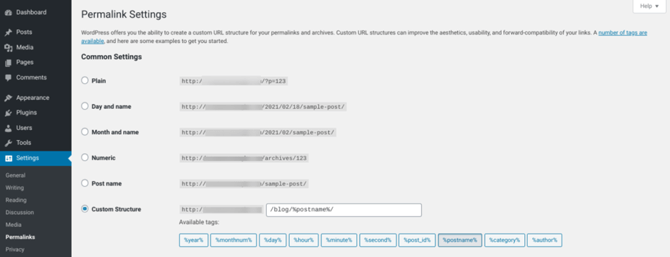
To boost your WordPress SEO, we recommended ending the URL with either the post name or the post category and then the name.
Alternatively, you can define your own structure by selecting the Custom structure checkbox.
Establishing a concise and consistent permalink structure can set your WordPress website up for SEO success.
However, it’s also important to optimize each page’s individual URL using a plugin such as Yoast SEO, which we discussed earlier:

Whenever you create a page, WordPress automatically generates a URL. You may be able to optimize this URL by removing ‘stop words‘, which are common words such as “its“, “an“, “and“, “the“, and “that“.
These words contribute little to your WordPress website’s SEO, while also eating into your character allowance.
You may also benefit from inserting relevant keywords into each automatically-generated URL. If you’re unsure which keyword would be best for a particular post, you can conduct some split testing.
Ideally, you’ll optimize a page’s URL before hitting the Publish button. However, you can also edit a URL after a page or post has gone live, by hovering over it in the WordPress dashboard and selecting Quick Edit.
5. Include SEO-focused Alt Text for Your WordPress Images and Media
Alt text describes an image or video’s appearance or function. This is crucial for creating a more accessible web.
Technologies such as screen readers use alt attributes to help visually impaired users understand a website’s contents, even if they cannot experience the associated visuals.
Alt text is also important for WordPress SEO. Search engine bots will use your alt text to help them interpret an image or video’s contents.
In this way, alt text can help search engines index your media correctly. This in turn will help your WordPress website rank highly for relevant keywords.
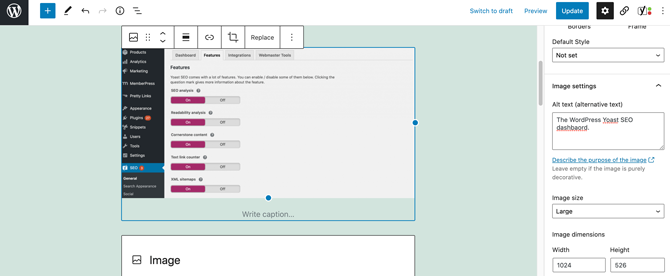
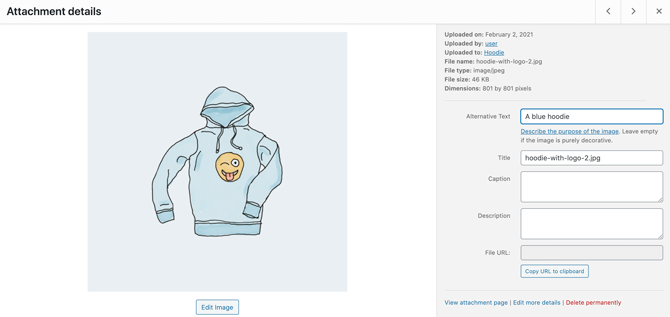
You can set the alt text by selecting any image or video in the WordPress editor. You can then enter your text into the Alt Text box:
Alternatively, you can assign alt text to any image or video in the WordPress Media library. This text will then be applied every time you use the same image or video.
However, note that any copies you’ve previously inserted into your pages and posts will be unaffected by this change, so you’ll have to adjust them manually.
To add your alt text, navigate to Media > Library. You can then select the image or video in question, and complete the Alternative Text field:
It’s also a good idea to include relevant keywords in your file names. Optimizing these names can help search engines understand what each image or video is all about.
Wherever possible, we recommend doing this before uploading each media file to WordPress. This is because there’s no built-in way to rename your files from the WordPress dashboard.
If you do need to change a file name, however, you can use the Phoenix Media Rename plugin. This plugin adds a new Filename field to the Media editor, which you can use to rename your images and videos for better WordPress SEO.
6. Arrange Your WordPress Posts and Pages Using Categories and Tags
Categories and tags are the two primary ways of grouping content on your WordPress website. You can use categories to sort your posts into different sections.
All WordPress posts must be filed under a category, and you can place a single post in multiple categories.
Meanwhile, tags describe your posts in more detail. Visitors can click on a tag to see similar content. Unlike categories, tags are completely optional.
Categories and tags can help search engines understand your content. A clear, consistent structure of categories and tags also makes it easier for visitors to discover related content.
This improves the UX, which as we’ve discussed can boost your WordPress SEO.
You can assign tags and categories to a post as you’re creating it. You can also create new tags and categories on the fly by selecting the Post tab:
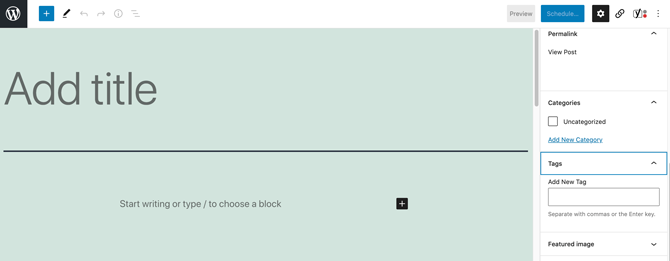
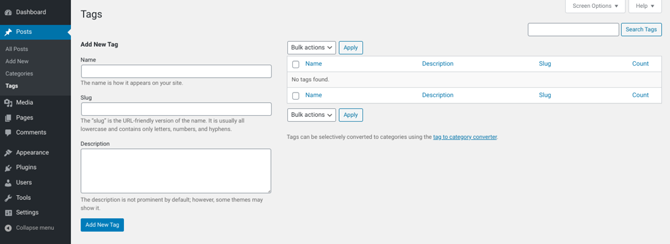
Then you can either select Add New Category, or enter your new tag into the Add New Tag field. Alternatively, you can create new tags and categories by navigating to either Posts > Categories or Posts > Tags:
If you don’t manually assign a category, WordPress will sort your posts into its default “Uncategorized” option.
You’ll typically want to avoid placing your posts into a generic category, as this represents a missed opportunity to improve your WordPress SEO.
If you do want to have a general category, we recommend changing the title from “Uncategorized” to something that more accurately represents your website’s content:
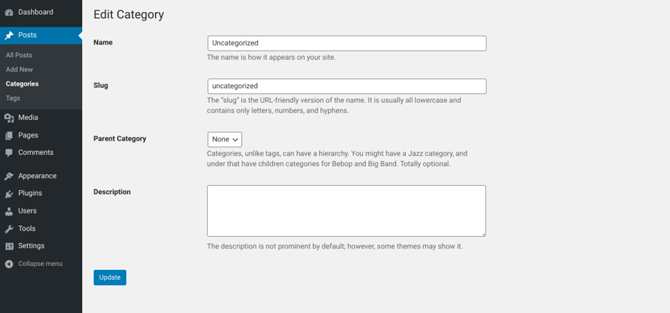
You can edit the “Uncategorized” title by navigating to Posts > Categories > Uncategorized.
Updating the category name to something a bit more descriptive ensures that it always communicates something meaningful about the page’s contents, which is great for your WordPress SEO.
7. Boost Your WordPress Website’s Performance and SEO With a Caching Plugin
Google uses page speed as a ranking factor. This means that your website’s performance will impact where it appears in the SERPs.
Fortunately, you can often significantly boost your page speeds using a WordPress caching plugin. This tool will make a copy of each web page after the first load, and then serve that cached copy to subsequent visitors.
This means that WordPress isn’t wasting resources performing the entire page generation process every single time someone arrives at your website.
There are many caching plugins available for WordPress. For example, W3 Total Cache offers a wide range of caching capabilities, including page, browser, object, and database caching.
After activating W3 Total Cache, you’ll see a new Performance tab in the WordPress sidebar. This tool has many settings, and it’s well worth exploring the various submenus to ensure that it’s configured exactly how you want.
However, at a minimum we recommend enabling page caching by navigating to Performance > Page Cache:
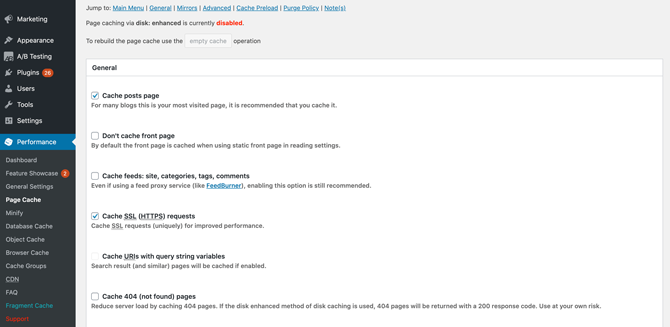
Here, you can choose which pages the plugin should cache. By default, every single request to your WordPress website is rendered in real time.
This may be appropriate for pages that you regularly update with new materials or those that feature dynamic content. However, if a page is mostly static, you can significantly improve loading times (and by extension your WordPress SEO) by caching it.
As a general rule, you may want to consider caching your website’s home page, as this is the page that typically receives the most traffic.
If your site offers membership functionality, you may also want to consider enabling the setting Don’t Cache Pages for Logged In Users.
Logged in users are often editing their pages. If you leave caching enabled, you run the risk of displaying outdated content to your members, harming your search rankings in the process.
Also to enhance your site speed, consider utilizing WordPress speed optimization service.
8. Protect Your WordPress Comments Sections to Avoid SEO Penalties
Spam comments are bad news for your WordPress SEO. Search engines aim to prioritize sites that provide a strong UX. This means that low-quality, spam comments can negatively impact your search engine rankings.
A lot of unrelated spam comments also make it difficult for search engines to determine your website’s contents. This can lower your chances of appearing in relevant SERPs.
To help protect your website, you may want to enable comment moderation in WordPress. This ensures that no comment is published without your explicit approval.
To do this, you can navigate to Settings > Discussion in your WordPress dashboard. Then you can select the Comment must be manually approved checkbox:
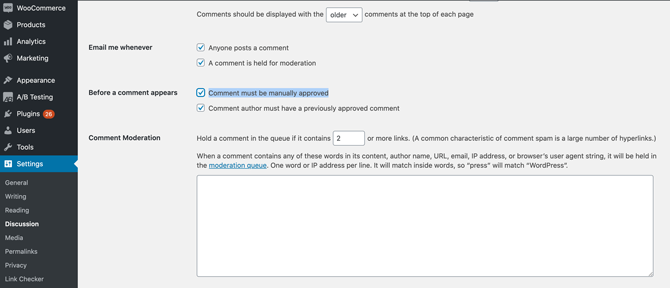
You can also set some ground rules for your comments. For example, you might only accept submissions if the author provides a name and an email.
You can also protect your website against comment spam by only allowing messages from registered members.
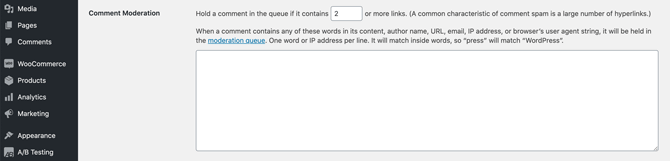
Spam comments can sometimes contain links to malicious websites. You can help WordPress identify and block this kind of comment spam by using the Hold a comment in the queue if it contains… setting:
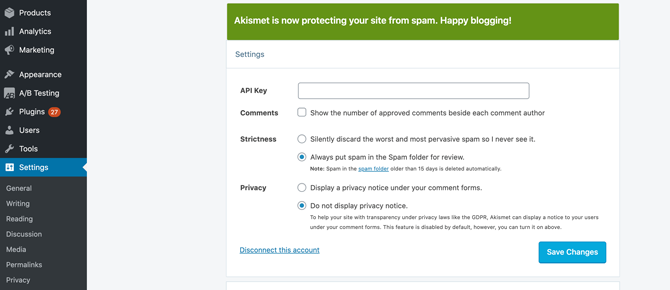
Alternatively, you may want to use an anti-spam plugin such as Akismet. This tool usually comes pre-installed with WordPress:
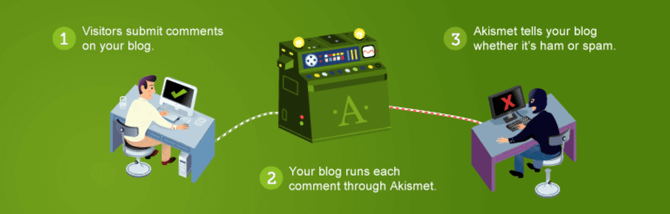
Akismet filters all of your comments through an anti-spam database, and can catch the most common types of spam. The plugin is free to use, but you will need to sign up for an API key.
After activating Akismet, you can configure it by navigating to Settings > Akismet Anti-Spam. There, you can specify whether Akismet should automatically discard the “worst and most pervasive spam“:
Alternatively, Akismet can automatically send suspicious messages to the WordPress Spam folder. These comments will be deleted after 15 days.
9. Use SEO to Create Better WordPress Summaries and Excerpts
Depending on how your site is structured, WordPress may display each post in multiple locations. Some common places include your home page, tags archive, author pages, and category archives.
By default, WordPress always displays the post in its entirety. Duplicate content is bad for SEO, however, so this default behavior can damage your search engine rankings.
Displaying the same content multiple times also isn’t ideal from a UX standpoint, and can make your pages load slower. Both of these factors can chip away at your WordPress SEO over time.
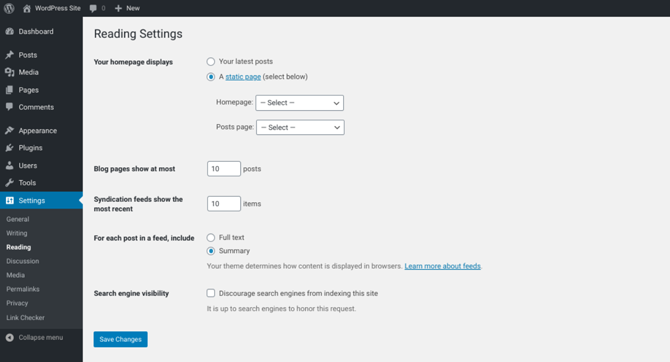
Instead of displaying the full post, you can show summaries, also known as ‘excerpts‘. An exerpt is a short snippet that WordPress will display in key locations, such as your home page and recent posts list.
To make this change, navigate to Settings > Reading. Then you can select Summary:
By default, WordPress generates a summary using the first 55 words of each post – although this number may vary slightly depending on your chosen theme. By writing your own summary, you can create a more engaging teaser for your post.
This can boost key metrics that search engines use as ranking signals, including the number of pages visited and time spent on your site.
Excerpts can also be an opportunity to include relevant keywords. However, as always, be wary of keyword stuffing. At the very least, we recommend making a few tweaks to the automatically-generated excerpts to avoid duplicate content penalties.
To write your excerpt, you can open a post for editing as normal. In the WordPress editor, select the Post tab, and then click to expand the Excerpt section:

Now you can write your excerpt, and publish or update the post as normal. Rinse and repeat this process for every post where you want to use a custom excerpt.
10. Consider Using ‘nofollow’ Links on Your WordPress Site
Nofollow links are hyperlinks that don’t influence your site’s search engine rankings. Whenever you use the “nofollow” tag, you’re telling the search engines not to crawl these links.
This means that nofollow links don’t directly impact your WordPress SEO.
Nofollow links may be slightly niche, but there are some scenarios when they can help preserve your site’s SEO.
For example, the “nofollow” attribute is commonly used to avoid penalties when there’s a chance that search engines may identify a link as suspicious or penalize you for paid links.
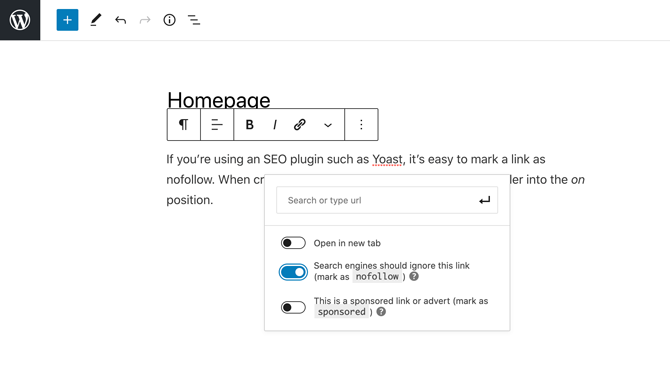
If you’re using a WordPress SEO plugin such as Yoast, it’s easy to mark a link as nofollow. When creating your link, simply push the nofollow slider into the on position:
It’s worth noting that nofollow links can still have an indirect impact on SERPs. For example, one of these links may drive a large amount of traffic to a particular web page.
Search engines should take notice of this increased activity, determine that this page offers relevant, interesting content, and adjust its ranking accordingly.
In this way, the nofollow link has indirectly improved your WordPress page’s search engine rankings.
11. Create a WordPress Sitemap to Enhance Your SEO
An XML sitemap is a file that lists all of your WordPress website’s content in XML format. The sitemap can help search engines discover, understand, and index your content, to ensure that you’re in the running to appear in relevant SERPs.
WordPress 5.5 introduced a basic XML sitemap feature. You can view this automatically-generated file by appending “wp-sitemap.xml” to the end of your site’s domain name in your browser.
For example, if your domain name is “www.mywebsite.com”, you can view your sitemap at “www.mywebsite.com/wp-sitemap.xml”.
Sometimes you may want to edit your default XML sitemap. For example, you might need to exclude duplicate content, such as archive and tag pages.
This can help you avoid duplicate content penalties and ensure that search engines aren’t wasting their crawl budgets.
Many popular WordPress SEO plugins give you more control over your sitemap. For example, if you’re using the Yoast SEO plugin, you can customize your XML sitemap by navigating to SEO > Search Appearance > Content Types:
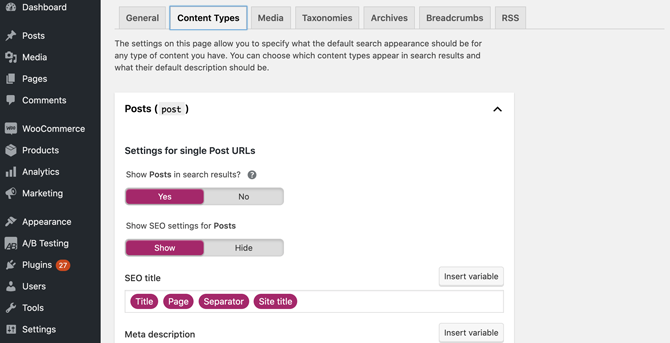
Here, you can specify whether posts, pages, and other custom post types should be included in your sitemap. Removing a post type from your sitemap will also remove it from the search results.
You can also get even more specific, and remove individual web pages from your sitemap. For example, you may want to keep internal pages, such as your login or admin page, out of the search results.
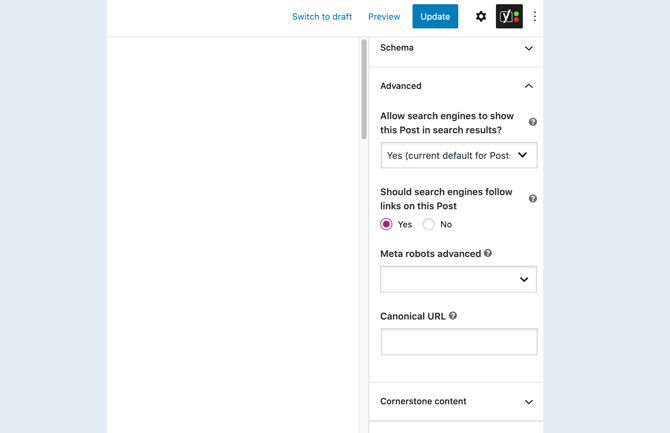
You can remove a page by marking it with a noindex tag. When editing the item in question, click to expand Yoast’s Advanced section:
You can then open the following drop-down menu: Allow search engines to show this Post in search results? To remove this item from your sitemap, select No.
12. Make Sure Your WordPress Site Is Using SSL and HTTPS
A Secure Sockets Layer (SSL) certificate encrypts all sensitive data, and uses HTTPS to transmit information instead of HTTP.
This makes SSL an important tool for protecting your WordPress website against malicious third parties. Therefore, it’s unsurprising that Google uses HTTPS as a ranking signal.
Many browsers indicate that a site is using SSL by displaying a padlock icon alongside the website’s address.
If your WordPress website doesn’t have a valid SSL certificate, security-savvy visitors may distrust your site. In turn, their behavior (such as navigating quickly away) can harm your WordPress SEO.
Some WordPress hosting providers supply SSL certificates as part of their hosting plans.
It’s always worth checking your provider’s admin panel for SSL-related options, as you may already have access to a certificate. If you’re unsure, you can contact your hosting provider directly.
If you don’t have an SSL certificate, you can purchase or acquire one from a trusted authority, such as Let’s Encrypt. You can then install it using a WordPress plugin such as Really Simple SSL.
After activating this plugin, navigate to Settings > SSL:
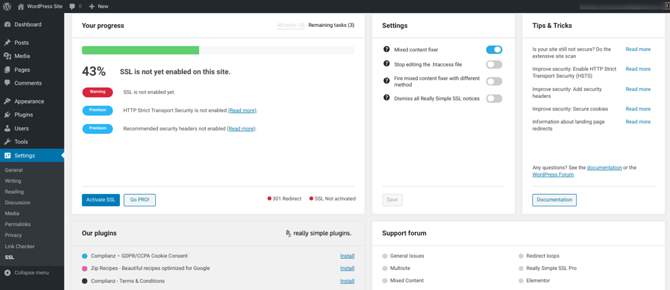
You can then select Activate SSL. That’s all you need to do!
After enabling SSL, you may also need to set up redirects for any unsecure URLs that are shared elsewhere.
For example, if a third party is linking to an HTTP version of your content, you may need to create a redirect to the new HTTPS version of this web page.
This ensures that you don’t miss out on any traffic, or incur WordPress SEO penalties as a result of broken links.
As we mentioned earlier, you can use a plugin such as Redirection to manage all redirects on your WordPress website.
13. Optimize Your WordPress Site for Google’s Core Web Vitals
Google’s Core Web Vitals are a set of performance metrics. The search giant uses these numbers to determine how users perceive the experience of interacting with your WordPress website.
Google has confirmed that Core Web Vitals will become a ranking factor as of May 2020.
To help you meet Google’s Core Web Vital criteria, it’s a smart idea to create an Accelerated Mobile Pages (AMP) version of your website.
According to the AMP website, 60 percent of AMP domains pass the Core Web Vitals test, when compared to 12 percent of non-AMP domains.
You can generate AMP-valid markup based on your existing WordPress content using the AMP for WP plugin.
After activating this plugin, you can generate your markup by navigating to AMP > Setup. You can then follow the onscreen instructions:

Core Web Vitals also takes your website’s performance into consideration, particularly your Largest Contentful Paint (LCP), First Input Delay (FID), and Cumulative Layout Shift (CLS).
If you’re using a WordPress caching plugin, you’re already off to a strong start.
It also helps to compress your images on your WordPress site, using a solution such as the TinyPNG plugin. This plugin automatically optimizes new images on upload.
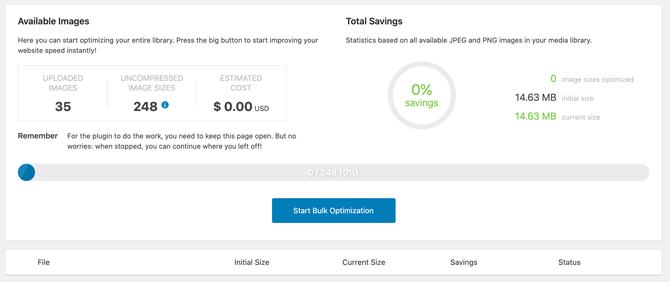
You can also optimize individual images that are already in your WordPress Media library, or perform bulk optimization.
To optimize all of the images in your Media library, navigate to Media > Bulk Optimization:
You may also benefit from compressing or ‘minifying’ your code. Most modern websites rely heavily on JavaScript and CSS.
Individually, these scripts shouldn’t slow your website down, but the more you use the more they add up. You can minify JavaScript, CSS, and other types of code using a plugin such as Autoptimize or Fast Velocity Minify.
Further Read:
- 10 SEO Agency WordPress Themes to Boost Your Digital Marketing Business In 2024
- Top 6 WordPress On-page SEO Plugins to Help You Craft Search Engine-Friendly Content In 2024
- Top 10 WordPress SEO Plugins to Supercharge Your Google Rankings In 2024
- WordPress SEO: Practical Guide to Rank High for Search Engines in 20 Steps [2024]
Conclusion: A Complete Guide to WordPress SEO
Improving your WordPress website’s search engine rankings isn’t easy. To succeed, you need to optimize every new page, post, and media file using proven techniques and trustworthy tools.
Installing a dedicated WordPress SEO plugin such as Yoast SEO can be a solid first step to enhancing your rankings.
A caching plugin such as W3 Total Cache is also essential for reducing page loading times, which Google uses as a ranking factor.
For the best results, we also recommend looking for opportunities to include relevant keywords in your WordPress content, including your permalinks, excerpts, and alt text.
Do you have any questions about improving your WordPress SEO? Let us know in the comments section below!